Projects on My Plate

  • Veda's Birthday Party
  • Sienna's Birthday Party
  • Sienna's Pencil Skirt
  • Pencil Skirt
  • Wardrobe re-do
  • Floral Skirt for Mommy
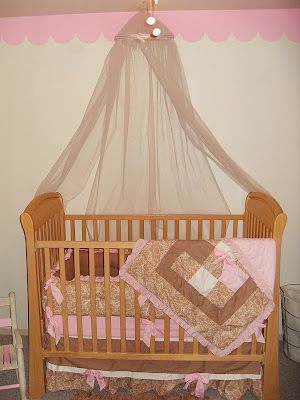
  • Breck's Bedding
  • Sienna and Veda's Bedding
  • Apron
Showing posts with label sewing. Show all posts

Monday, October 10, 2011

Day of Mourning

This last week, something awful happened. My sewing machine died.

I knew this day was coming soon, I could see the signs for awhile now. After all, it was just a very basic Singer, that was purchased for me only for the purpose of getting the hang of sewing. But nothing could prepare me for the shock I felt when it finally gave it's last breath. I just stared at it blankly in disbelief. This can't be happening... not now...not at the beginning of my biggest sewing season! Disbelief was then replaced by remorse when I started reminiscing about how it was my first sewing machine, how I awkwardly began to try to sew on it (with hardly any previous experience), found my footing (no pun intended), and found my life's newest obsession.

I thought back to everything I had created on the blessed machine:

I started out small, helping a friend make this cushion cover for her rocking chair (my first REAL project on the machine)

I then gained confidence to do other simple things for our house like this...

...then this
...then eventually this

 Which gave me confidence to try out Halloween costumes like this...

...then eventually this

I started to get excited about making little odds and ends here and there, like this nursing cover

And I even got courageous enough to try making a smocked dress for Sienna...

...which led to this...

...and eventually this

In fact, I became so in love with sewing, that I started altering clothes to more fit my body and my style, something I had always dreamed of doing, even as a young girl...

...which led to me figuring out how to make clothes for myself...my ULTIMATE goal!!

All on my basic little Singer that tooted it's last toot this last week. So you can see my sadness, the end of a machine that used to intimidate me so much, that turned into a love of a skill I never knew I had, and ultimately, fulfilling a major dream I had my whole life. Now, of course I have dreams now beyond that, in being able to refine my skills and become a better seamstress, but I can't help but reminisce on the things I was able to pop out on that little machine.

Though I am feeling really ready to move onto a newer, more advanced machine, I'm grateful for the lessons I was able to learn on my simple little Singer.

Wednesday, October 5, 2011

The Belle Costume - Only One Year Late...

So now that we're all healthy again, I decided to write up (finally) a tutorial for the dress I made for Sienna for Halloween last year. Unfortunately, I did not take any pictures of the process, so all my pictures are computer illustrations. Let me tell ya, I think I really missed my calling in computer animation. I'm simply amazing. I'm pretty sure Pixar is going to call me up if they ever see this post and offer me a job.

Okay, enough sarcasm. But hopefully the pictures will at least illustrate well enough the process to make this dress. Click on the pictures to enlarge them if it makes it easier to read the text.

In case you missed it, which, you most likely did since at least 100 of the followers of this blog are new, here is the little dress I made my Sienna last year for Halloween. She was two.


There are a few preparatory things you need to do before you get started on this project.

-Get all the measurements of the little girl you are making this for. You will need the length from shoulders to waist, the length from waist to feet (or where you want the dress to hit), her waist measurement, and her chest .

-Based on measurements, compile two different fabrics. One for the main dress, and the other for embellishments. Sienna was two when she wore this, but was the size of a three year old. (At least) We used about 2 to 2/12 yards for the dress, and about 1/2 for the embellishments.

-Get some jewels, covered buttons, rossettes, etc. for further embellishment.

Now onto the instructions...

Lay out your fabric, and cut it as pictured. Your edge peices will not count as pieces, they have to all be the same and regular trapezoids. You will need 8 pieces in total. The length of the pieces should be at least double the length you measured from the waist to floor, depending on how big of a ruffle you want. I'm pretty sure mine was double.

Gather each long side of each trapezoid. You can do this easily by adjusting the thread tension and the stitch
length to the highest setting. Then measure to see how long it is, and if you need to gather it more to make it equal to the waiste-floor measurement, then gather it by pulling on the top thread, while guiding the fabric up the thread to create a bigger rufle.
 

Repeat the last step for the rest of the 7 pieces, then sew them all together, with, of course, the raw edges on the inside. Serge or zig-zag stitch each hem, so that it is reinforced as a gathered hem, not just the individual hems.

Once your skirt is in skirt shape, make a V in the front to allow the V shaped bodice to easily attach. The V should be about 2 inches in depth, starting from the sseam that will lay on the hip, to the other hip, as pictured below.

Sew a line around the top of the skirt using the same technique for a gathered seam. Then, pull threads again to match up with the waiste measurement you took.

Next, we're going to add the embelleshment to the bottom. You're going to need a very long strip. How long, is dependent on what size of dress you are making. In the picture it says it's equal to the width of the skirt at the portion it will be placed on, times 1.5, since it needs to drape a little. This is approximate, of course, so make sure you double measure. Measure around the portion of the dress that the embellishment will go on (around 8-16 inches off floor, depending on size of dress), then add a few inches as needed to get the total length of this strip. The idea is that this strips drapes 2-3 inches per section. The height will be around 5 inches.

Next, you will fold the strip in half, with wrong sides out, sew down the edges, and pull inside out to reveal the right sides. The height should then be about 2 - 2 1/2 inches, depending how big your hem was. Reinforce hems as necessary.

Next, you are going to gather the strip. Lay it against the dress, and make sure it drapes a little per section. Place a pin on the strip where each section of the skirt meet. Then gather where those pins are as illustrated. 

Attach to skirt. Make sure gathers correlate with the seams on the skirt.

Next, we move to the top. Find an article of clothing that your little girl fits well into. As a tip: if you are using fabric that stretches, use a shirt that stretches, like a knit. If your fabric is not stretchy (like mine), use a shirt that fits well, but does not stretch. I have a tank top shown, but you can use any shirt. It's really just to illustrate what portion of the shirt we are using.

Trace the outline of the shirt onto the fabric. Don't forget to include the hems in your tracing, because you will be hemming as well! You will need 2 pieces for the front. One will be one inch wider than the shirt outline you trace. I'll explain that in a bit. Just add the extra inch to the middle.

You will use one back piece, and you will add 3 inches to the width to allow for buttons.

Remember to make sure the length of the top is the same as the measurement you took from shoulder to waiste.

On the front pieces, make sure you extend the bottom down a little to make a V like we did with the skirt, as illustrated.

Cut a line down the middle of the bigger of your front pieces. This will be that seam that most Disney princesses have down the front of their dresses. Put right sides together, and sew a 1/2 inch hem. Reinforce hem.

Now we want to attach our front pieces. Put right sides together, with the hem from the top piece facing outward, as pictured below. Then sew together where the picture show a red line.

Then flip inside out so the right sides are facing out. Sew along the entire outise, including going over (as close to the edge as possible) the seams we just made that are now on the inside.

For the back, Cut a line down the center. Then hem up the sleeves as shown.

Do a zig-zag stitch, or serge the edge of each side that you just cut. The x2 means do it for each side.

Fold and iron down 1 1/2 inches from the edge, over to the backside, as pictured. Then hem the neckline over top. Do this for both sides.

Make a pencil marking (or mental note) of 1 inch from the edge on each side. This is where your buttons will be. Make sure you measure again and again where your buttons will be to make sure they are even. You'll want to be sure there are at least 1 1/2 to 2 inches between buttons, so we can add embellishment later. Since all sewing machines are different, I will assume you know how to use yours to make a button hole. Most sewing machines have a stitch option for this. Consult your owners manual to learn how to use it, if you don't already know.

Then, attach the back of the top to the front of the top. Reinforce hems as necessary. Measure the width to make sure it correlates with the waiste circumfrance and the chest circumfrance.

Attach Top to Bottom. The buttons should be buttoned up to ensure that the sides are sewn to the bottom correctly.

You can add any sort of embellishment you want at seams. I did rhinestones. You can also do covered buttons, rosettes, etc.

Now for the Top embellishment.

Cut a strip of fabric (the same fabric as the embellishment for the bottom) that will fit around the top of your little girl's arms right at the shoulder. It needs to be long enough to wrap around the back inside panels about 1/2 to 3/4 an inch. It also needs to be about 6-8 inches in height, depending on the size of dress you are making.

Next, fold that piece in half length wise, and sew along raw edges as shown. Sew along the red line.

Sew along the red lines and gather. The raw edges on the very end need to be serged or zig zagged, or even heat sealed, if the fabric is some sort of synthetic fabric.

Attach it to the top in the places indicated in the picture below. See Purple picture below this one for a more clear visual on attaching it to the back. It can be attached with a sturdy hand stitch on the front and on the sleeves.


I then added another rhinestone embellishment to the center of the fron. You can add covered buttons, rosettes, etc.

And Guess what???? You're DONE!!!


Monday, October 3, 2011

Veda's Blessing Dress - And Some Tips

As promised...I'm actually posting!! HOORAY!!

In our church, we bless our babies within a few months after they were born. It makes their membership on our church records official, and we're able to hear a wonderful blessing with it. It's similar to a Christening.

Veda was blessed in church the first week of September, and I was able to make her a little dress. I didn't make a tutorial for it, but I have listed some helpful tips when making a dress with no pattern, to let you know how I go about it, almost everytime I make something.

It was pretty simple, though it was my first major project in awhile, so I was a little intimidated. It felt good to spend a day at the sewing machine, and reap the reward of my labors!

 I went for a vintage feel with this dress. I was thrilled when someone at church asked me if the dress was handed down from a great grandmother or something. I said no, but that that was sure the look I was going for!


P.S. Our Camera is on the fritz...so sorry we have to take less-than-amazing pictures for a little bit (not that they were awesome before, but now they're "phone-quality")

The edge of the mesh fabric over top on the bottom is scalloped


Now for some TIPS!

1. When figuring out what you want to make ALWAYS draw it out exactly how you want it. Make notes as to where you want it to hit in the waist, length, and sleeves. Put all the little details on it.

2. Whenever doing laundary, shopping, etc. notice the way clothing is made. Study the lines, techniques, how they finish hems, where gathers are made, and how they are attached. This helps me to figure out how I'm going to accomplish a particular design.

3. Use clothing you already have as patterns. Always, ALWAYS use like fabric. If you are making something with a knit, use a knit as your pattern. That wasy you know the pattern you are using was made to stretch. If you are using a woven fabric in your project, use a woven as your pattern. That way, you know that the pattern wasn't made to stretch.

4. Always remember when tracing clothing to remember to add room for the hem.

5. Always reinforce hems. If you don't have a serger, use a zig zag stitch. Sometimes I like to use a faux-serge reinforcement, which I achieve by sewing another straight line next to the original (on th inside, toward the edge), then I do a really tall and close together zig zag stitch. Then I cut off any fabric that extends beyond the zig zag, so the zig zag is right at the edge. At first sight, it sort of looks like you used a serger!

6. When sewing with lace or mesh, without anything behind it, use toilet paper underneath as an interfacing, of sorts. You can then rip it off, and soak it in water, and the rest will dissolve out.

7. Arms and sleeves can always be tricky, so measure, and measure again! Look at lots of sleeves of different clothes you have and memorize how they are attached and shaped.

8. If you flop the first couple of times...KEEP TRYING!! You will only learn more and more the more you do, and you will then become that much more familiar with how clothing should be sewn. I can't even tell you how many pieces that I was excited about ended up in the trash. But - I'm always extra careful about those mistakes now!

Friday, April 22, 2011

New Maternity Clothes, Please! Stretch Pants

"Sometimes, when you are a man...you wear stretchy pants...in your room...it's for fun."

I was able to get this project finished before the big move, which has been nice because I've been able to enjoy these bad boys most of my pregnancy.

This was a pretty easy alteration, and pretty straight forward. Truth is, I miss stretchy pants from the 80's, and had been wanting to get my hands on some for awhile. Then, while spending countless hours on my miserable back during the first + trimester of pregnancy, the thought occured to me... why not alter some black stretchy workpants from my first pregnancy??? Though my pregnant brain was fried with hormones and I forgot to take pictures before and during the process, I have conveniently illustrated as best I can the process for alteration. This process would work for altering flare jeans into skinny jeans as well, but make sure you use heavy duty needles and thread!

Here is a representation of what the pants looked like before: just your standard black, stretchy maternity workpants. Convenient, but plain.
The first thing you want to do is to turn them inside out and put them on. Decide how tight or loose you want them.
After you have a feel for where you want parts taken in, pin the pants in a vertical pattern so it creates an outline of where you want to sew. Remember, you should still have your pants on.

Take your pants off carefully, I think I got stuck a few times in this process, but I did rush it. If you're not home alone, it might be a good idea to replace them with another pair of pants.

Sew along the pin line, removing pins as you go, so you can sew in the exact area of the pins. Reinforce your hem to your preferrence.


Do this for both sides, and cut the excess fabric off as close to the reinforced seam as close as you are comfortable with.
Turn pants back right-side out, and you've got yourself some genuine 80's stretchy pants to comfort your growing body (or regular body) during pregnancy!

This isn't supposed to be a belly shot, but sometimes I like to emphasize that it is actually a baby there, and that I'm not just a super-sized Sarah in a mu-mu.

And isn't it kind of nice to focus on something on your body that isn't quadrupling in size?? Well, I guess at least from the knees down...

Friday, April 15, 2011

Shawnte's Baby Gift #3

And finally, here is the last of the gifts that I made for Shawnte's new baby girl...like 3 months ago now. Man, what is wrong with me???

This is was what took up most of my time with the gift. It was a dress I decided to make for baby Demi. I remember not having very many dresses that would fit Sienna when she was first born, so I wanted to make a dress she could wear to church in her early months.

I didn't use a pattern for this, but used Sienna's baby blessing dress as a guide for size and shape.

It took awhile, and I definitely ran into some bumps, but in the end it turned out alright, and Shawnte' loved it, so that's what matters, right?


*On a funny little side note, when Shawnte' pulled this gift out, and found out that I made it, she exclaimed, "I seriously thought you bought this from a store!" Though no presents were being passed around, she insited on passing it around, and when it got to someone that was there that I've known for awhile, this person was overheard to say, "Umm, you can totally tell it's homemade." Duh! That's because it IS! That's the point! I just laugh about it. Goofball.
Blog Widget by LinkWithin