Projects on My Plate

  • Veda's Birthday Party
  • Sienna's Birthday Party
  • Sienna's Pencil Skirt
  • Pencil Skirt
  • Wardrobe re-do
  • Floral Skirt for Mommy
  • Breck's Bedding
  • Sienna and Veda's Bedding
  • Apron

Tuesday, May 18, 2010

Silhouettes for Mothers Day

While I understand that Mother's Day is long gone, I wanted to post my project I did for my mom. I had to give it to her late, since I did not see her until this last weekend (which would explain lack of posting), so I didn't want to post it earlier, and risk her seeing it!

I decided to make her an etched cylinder candle holder/vase with my kids' silhouettes being the design etched on them. This was relatively easy, and enjoyable to do. I'll show you how...

What you Need:
Bumper Sticker Paper (found in most office supply stores) contact paper is ok too
Printer Ink :)
Pen
Scissors
Tape
Etching Cream
Paint Brush
Water Supply
Embellishments, if you want


Step One:
Take profile pics of your kid(s).
I love how Breck is literally rolling his eyes in this picture...


Step 2: 
Print out those pictures onto the bumper sticker paper. Make sure, if you have different pictures, that the heads are all the same size. I had to go back and edit Sienna's picture.

Step 3: 
Cut out each picture. With a black or dark pen of some sort, trace a line around the outside of the profile as a guide for where to cut. Then cut out the profile, only making one line under the picture.

Step 4: 
Stick the bumper sticker paper picture onto the vase. Tape around the outer corners for more flub space. (I taped the cut line below the profile to make sure it stayed straight.

Step 5: 
Brush a thick layer of etching cream onto the profile picture. Let it sit for a minute or two, then rinse it off with water.

Step 6: 
Add any embellishments you want. I stayed simple and just added a single ribbon below the silhouettes.

Then admire your little one's face on the glass!

Wednesday, May 12, 2010

Blog Book 2009

Surgery is no fun, but it can be useful. When you're not allowed to do much, you suddenly have the time to spend on things that took you forever on a normal day. Such was the case with blog book #2!

It only took me a few days this time, partly because I had all the time in the world to spend on it, and partly because I didn't have to re-download every single picture like I did with 2008's book. Not sure why it turned out like that...but I'm not complaining!

So here's our blog book for 2009!

Monday, May 10, 2010

Living Room Afghan Pattern


As promised, here is the pattern for the afghan. It's pretty easy if you know how to crochet. If you don't, and you want to learn how, there's TONS of good videos on You Tube, so go buy some yarn and a hook, and get goin'! Then come back, and use this pattern to make an afghan!
Row 1: ch 122

Row 2: hdc in 3rd st from hook, hdc in every st to end of the row.

Row 3: ch. 1, sc in first st., skip 2 st's, then make 5 dc's in next st, skip 2 st's, sc in next st, repeat until end of the row

Row 4: ch. 3, then do 2 dc in first st. skip 2 st's,  5 dc's in next st, skip 2 st's, sc in next st, skip 2 st's, repeat until last st, then do 3 dc's in last st.

Repeat rows 3 and 4 until it's as long as you want it.

Once it's as long as you want it, finish it off with a row of hdc in each st.

Then, add the scalloped trimming, and you're done!

Friday, May 7, 2010

Living Room Afghan

Oh boy, oh boy, did I forget how much yarn an afghan takes to make! I started out with 4 skeins, (not to mention they were the small, half-sized skeins), and barely got a thick scarf! So after many more trips to the craft store for yarn, I finally finished this baby. I used the shell stitch, which I am rather fond of. I originally wanted to tie tassels to the ends, and then unravel them so they frayed, but with the type of yarn I used, it didn't look quite right, so I finished it off with a scalloped edge. (Surprised?) I tossed it over the arm of the couch, and what do ya know? It's a keeper!


By the way, I plan on posting the pattern to this...I just need to finish writing it out, so expect it sometime next week.

Love,

Wednesday, May 5, 2010

Blanket for Liliana

This is a blanket I made for our new(ish) little niece Liliana. I made it awhile ago, I didn't get it to them until March, and here it is May before I'm actually posting about it. Yikes, I'm on the ball, huh?

Anyway, here it is...I loved the colors on this one.

Monday, May 3, 2010

What do You do When You're Not Supposed to Move?

I had surgery Thursday, as mentioned earlier. Not a huge deal, but I'm still on orders not to really get up and do things (or lift any toddlers for that matter).

Soooooo...what do I do?

Well, Farmer's Market does start this week, so that means, I'm doing a lot of this sort of bed-friendly work!!.....

Stay tuned to see how they (and more) turn out...

Wednesday, April 28, 2010

Blog Book

Okay, Okay, I know this isn't really a craft, however this blog is called Sarah's Never-Ending Projects, and this was a doozy of a project! It's another one of those things that have been on-going, that I finally saw an end to!

I slurped my blog on Blurb (blurb.com) and made it into a book! This was for our family blog for the year 2008. It's harder than it seems though... you totally have to re-download and re-format every single picture that it slurps from your blog, because the image quality from being downloaded from your files to internet, back to your files is very poor. On top of that, it gives each picture it's own page so there's TONS of picture formatting to do, and page reduction, editing of text, etc. It took me FOR-EV-ER!

But it's finally done, and now I can breathe a sigh of relief for approximately 1 second, before I go and start on 2009!

Though tedious and seemingly never-ending, I completely recommend doing this. Getting the book in the mail makes it all worth it, and to know that we have sufficiently documented that year makes me feel good as well!


Monday, April 26, 2010

You Can't Ride in My Little Red Wagon


I know in your head now you're singing the rest of that line...Well, once again, I'm sorry for being such a slacker...I really did mean to be more regular with posting, as I still intend to do, I think I just have a lot that I'm working on that were on-going projects, so nothing was getting done. Hopefully now I can really get on the ball and get some stuff posted.

One of the things I have been working on was this shower for my friend, Paige, and her upcoming baby boy.

The theme was "Little Red Wagon", and it was lots of fun (not to mention cheap!) to plan, and I got to plan it with my good friend Alyssa (alyssabittybowtique.blogspot.com)! We stuck to the color scheme of the wagon (red, white, black), adding in natural effects such as burlap, twine, and tin cans.We wanted to feel really little boyish, reminiscent of a little boy playing outside all day.

The food was centered around little boys too, we had apples with dip, PB&J squares, a veggi platter, and themed cake. We also had some food for our own tastes as well, including the famous shower "cucumber bread" and cinnamon bears!

For the activity, instead of games, we had everyone decorate a page for an alphabet book for Paige's little boy. It was fun, and it's a cute extra little gift for Paige!

For the decorations, I'll just post the pictures and explain:


The tablescape

Side View...by the way...those are root beers, I thought it would be cute to have old soda bottles, but it kind of ended up looking like we were having a keg in the pictures. 
Tin cans hanging with daisies

Some of the table

The cake...a joint effort :)

Beautiful Paige...also, there are some pictures I took of Breck's red wagon for decor...cheap and easy, and it totally added to the themed decor!

The Alphabet book table area. Alyssa and I thought this would have looked cuter with some pom poms hanging above it, but wouldn't you know it, all the red tissue paper in Moscow was sold out...unless you want to pay 7 dollars for a small pack at Michaels. 

close up

The favor table

The favors: little red wagons with dirt mounds in them!

Monday, March 29, 2010

Push-In Pie Crust


So I know I don't usually do recipes, but there are a few out there that I have either come up with, or found that have changed my life. Seriously, I will never be the same cook. I love cooking, I mean really really love cooking, so I'm actually surprised I've never ventured into online recipe sharing.

Funny thing is, I love to cook, but I can't stand baking. It's not so much that I can't bake, just that I don't like to bake. The only time I semi-enjoy baking, is when it accomplishes my OCD desires to have a completely coordinating party. Baking just seems so redundant to me... flour, sugar, eggs, butter, rising agent...every single time...then you shove it in the oven. No diversity, and it's messy, then to top it off, offers little nutritional value. Don't get me wrong, I like to eat baked goods; really, I LOVE to eat baked goods, but I never want to go through the mundane, messy and long process just to eat something that's not good for me.

Cooking is just so diverse. Not only are your ingredients limitless, with a change in one spice having the ability to change the entire taste of the dish, but there are so many ways to cook something, all yielding completely different outcomes. You can bake it, sauté it, boil it, steam it, deep-fry it, grill it, or broil it. Then, you get a rounded meal for you and your family, so everyone wins!

When it comes to the holidays, i love cooking big feasts for our family. My dread comes in when I think about the PIES I have to make! And here's my other quirk, I really like doing things from scratch when it comes to the holidays, so I set this standard of pumpkin pie from a real pumpkin, apple (among other fruits) pie not from a can, and of course, homemade pie crust.

I don't know if you guys have ever tried homemade pie crust, but it's a pain. It's not very hard or intricate, but it's just annoying to mix, and everything has to be done in a specific order and time. Speaking of time, it feels like it takes forever too. Like I mentioned earlier, I'm all for not spending a ton of my time baking. You can imagine my delight when I found this recipe.

It's completely from scratch, and takes no more than 3 minutes to make, and you mix it and make it right in the pie pan, so no messy counter, extra bowls, or sore arms from excessive rolling! Perfect! This recipe is good for pumpkin pies, pudding pies, or dutch pies. You can also use it to make quiche, but make sure you cut out the sugar. It's not your best bet to use this for a pie that requires a top, as the texture isn't right to hold as a top crust, but it really makes a yummy (and homemade) bottom crust.

So enough of the rambling... here's the recipe!

Push-In Pie Crust:


1 1/2 Cups all-purpose flour
2 tablespoons sugar (emit for quiche)
1 teaspoon salt
1/2 cup vegetable oil
2 tablespoons milk


1. Place dry ingredients in pie pan (8-9 inch) and mix together with a fork.


2. Slowly add oil, then milk. Kneed with your hands a couple of times to ensure consistency in texture.


3. Starting in the middle, start pushing the crust down to the pan, and work your way out, until there is a thin and even layer of crust on the entire pan.


4. For pudding pies (or a pie that you are just refrigerating, instead of cooking) you need to bake the crust first at 425 degrees for 10-12 minutes. If you are making a pumpkin pie or quiche, just pour filling into uncooked crust, and bake for whatever the recipe calls for.


And that's it! I hope you enjoy this recipe as much as I do. I at least hope you can enjoy the time it saves! Happy baking!!
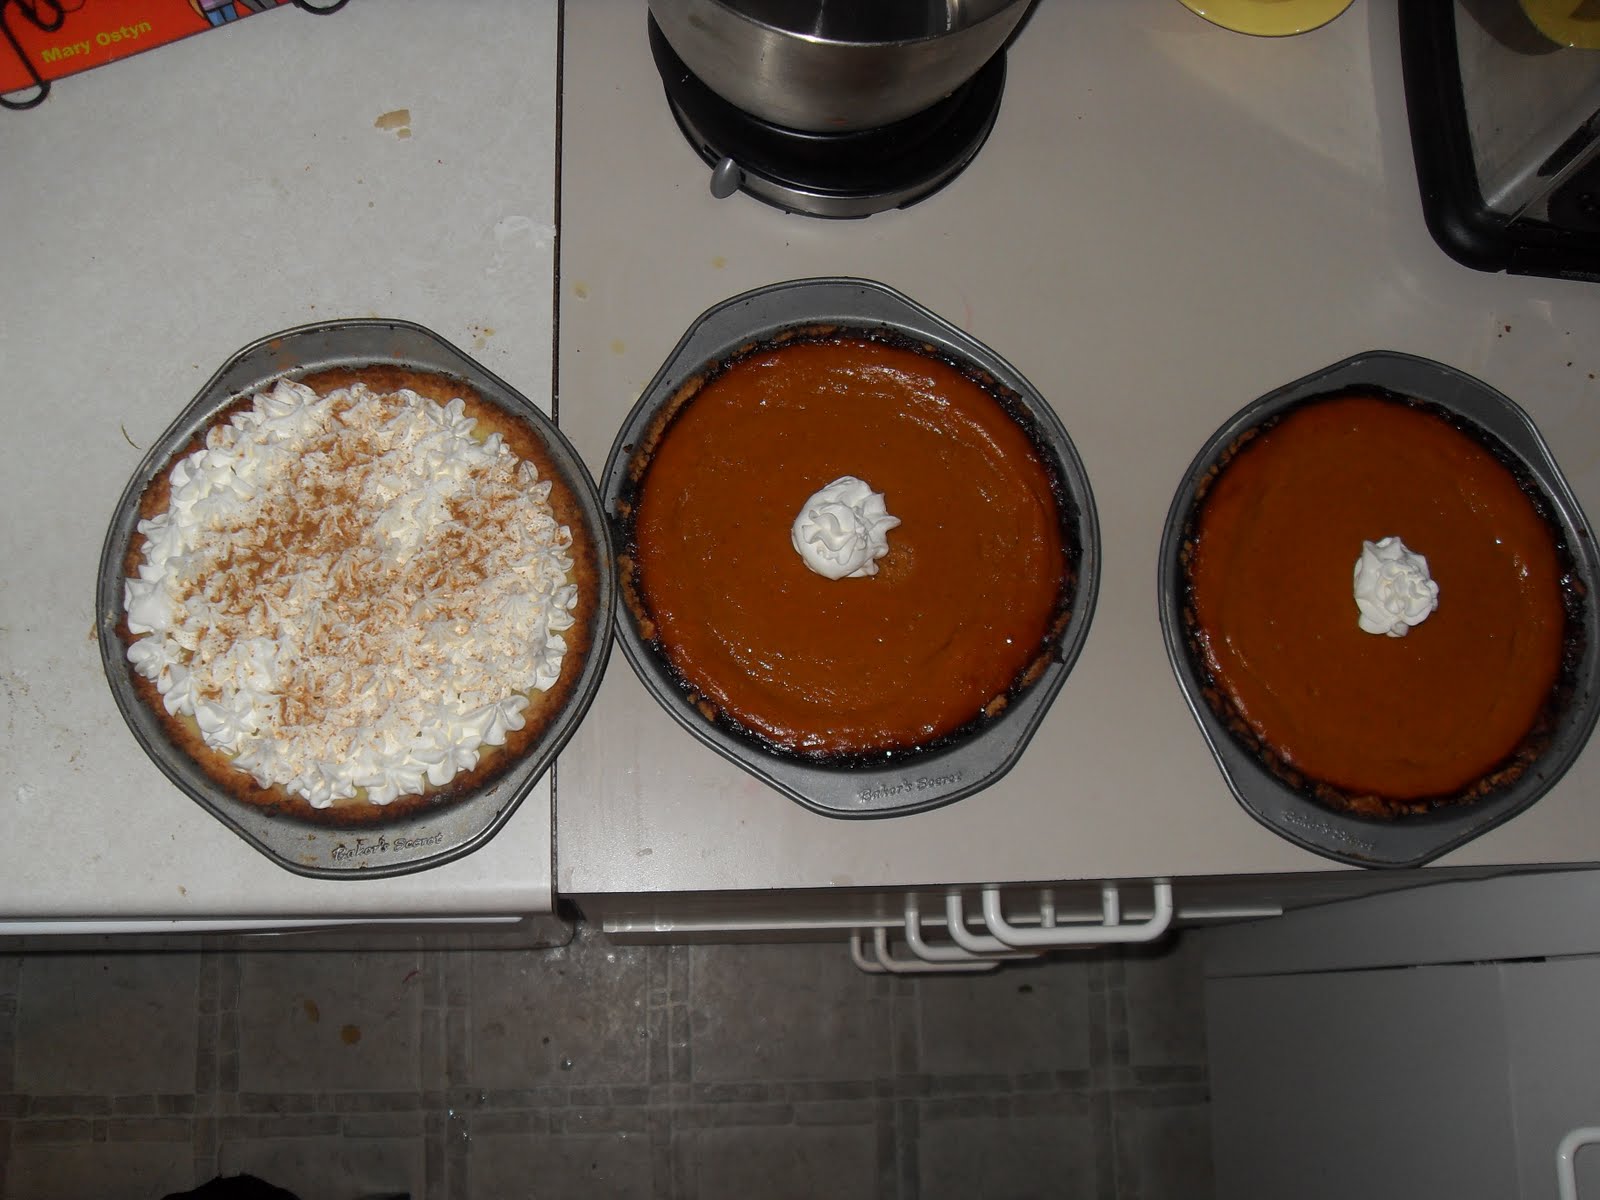
These 3 holiday pies were made with the Push-In Pie Crust!

Love,

Friday, March 26, 2010

At Last...an end result!

I am proud to say that Sienna's room is officially done! I'm sure I'll do little extra crafts for it here and there, but as a whole, it is complete! Here's some photos of my end result:

The Bedding that got the ball rolling...

Followed by the diaper stacker and changing pad cover...

Then...it all got put together!


Things accomplished with the room:
-made bedding
-made mosquito net
-made decorative circles on wall
-made changing pad cover
-made diaper stacker
-made valance
-painted scalloped trim on wall
-made canvas photos
-put up decorative accents and pictures
-made shaggy raggy rug


sigh... now onto Breck's big boy room!

Love,

Wednesday, March 24, 2010

Sienna's Shaggy Raggy Rug (For Reals this time)

This is my 3rd shaggy raggy rug to date, of many more, I'm sure. I enjoy making these, and I think they are just so darn cute! Since my other two rugs I have posted on here are my 1st and 4th posts, I wasn't as good at posting instructions in a clear manner, so I will post a better tutorial now.

What you need:

-7 1/2 yards of fabric (I suggest quilting solids, or light-weight cotton material of any type)
-about 3/4 yard of rug canvas (at most fabric stores, though JoAnn discontinued it)
-scissors
-patience

Step One:
Lay your fabric out and cut strips length-wise that are about 5-6 inches wide.


Step Two:
Once you have a bunch of long strips (all 5-6 inches wide), start cutting those strips along the width, about 3/4 to 1 inch wide. You should have a bunch of tiny strips that are all about 1 inch by 5 inches (approx.).


Step Three:
Cut your rug canvas to size. It should be about 100 squares by 70 squares. If you want a bigger rug, you may need a little more fabric.

Step Four:
Start tying them onto the rug as pictured. A single tie will do, you don't need to double knot or anything. There should be a space in between each tie, and each tie will occupy a hole from two rows. Thus, there will actually be only 50 rows that you are tying, with 35 ties per row.


You can see that each tie occupies two rows of squares. They are staggered with each new row.

Step 5:
Repeat rows, tying the strips into the opposite holes as the previous row, to create a staggered look. This will help it look more filled in.

Repeat this until rug is finished.


For different designs, refer to previous posts about the rugs. For this rug, I made the pink border first, then filled in the brown around it. I used about a yard of pink, and 6 1/2 yards of tan.
Blog Widget by LinkWithin